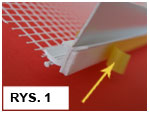
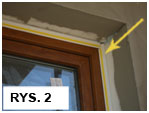
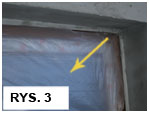
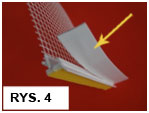
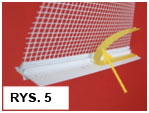
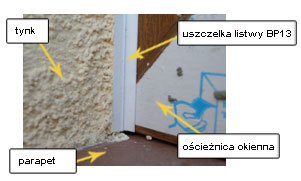
Installation of the bead should start by cleaning, degreasing and drying the window frame. Next, determine the installation site of the BP13 bead onto the window frame. The next step is to cut the appropriate length of the bead with a knife. Before gluing the bead, remove the yellow cover from the white expansion foam (FIG. 1) and immediately stick the bead to the frame (FIG. 2). After gluing beads to the frame, wait approx. 2 hours, to ensure good bonding of adhesive. The next step is to glue protective film on the window to secure it against soiling during plastering (FIG. 3). BP13 bead is provided with a movable lost element (FIG. 4), with an adhesive strip protected by a yellow cover (FIG. 5). Remove the yellow cover and glue the film to the adhesive strip (FIG. 3). The window prepared this way allows for starting plastering work without fear that the window will be permanently stained.
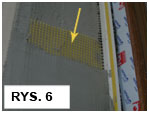
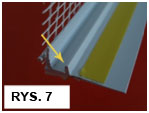
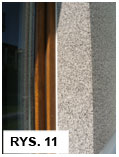
The first step is adhering the fibreglass mesh which is a part of the BP13 bead to the sides and top of window opening. This must be done so in a single gluing operation to combine with adhesive the reinforcing façade system’s mesh with the mesh from the BP13 bead (FIG. 6). After the adhesive has dried, the textured plaster should be placed at an equal thickness spreading it into the tray located in the BP13 bead (FIG. 7) and (FIG. 8). After the plaster has dried (preferably after a few days – depending on weather conditions) remove the lost element along with the protective film from the window (FIG. 4), (FIG. 9), (FIG. 10) and (FIG. 11). Removal of the lost element should start from the corner of the window in one downward movement.